
The fastest way to organize kitchen drawers is to empty them completely, group everything by how you use it, and assign each drawer one category before buying a single organizer. Most people do it backwards—they buy the cute bamboo dividers first, then try to fit their chaos inside them. If you want to know how to organize kitchen drawers properly, you have to start with the layout. It never works the other way around.
This guide walks through a method you can do in 90 minutes that stays organized for years, not days.
The Mistake Most People Make
Buying organizers before categorizing. Dividers bought without first knowing what you own and how many items need to fit usually end up wrong-sized, wrong-shaped, or overcrowded. Empty first. Sort second. Measure third. Buy last.
The other common mistake: trying to organize everything at once. Start with the two or three drawers you use most. Get those right, then move to the rest.
Step-by-Step: The 6-Step Drawer Method
- Empty every drawer completely onto the counter. All of them.
- Sort into categories on the counter: cooking tools, baking tools, cutting tools, takeout extras, batteries, etc.
- Discard duplicates and anything you haven’t used in 12 months. If you have 6 spatulas, keep 2.
- Assign each drawer one category. One drawer = one job. Don’t mix.
- Measure each drawer: width, depth, and height. Write it down before buying any inserts.
- Buy dividers/inserts sized to your measurements. Install. Done.
The Drawer Zone System: What Goes Where
| Drawer | What Belongs Here | Location Priority | Organizer Type |
| Cutlery drawer | Knives, forks, spoons, serving spoons | Closest to the table/eating area | Classic cutlery tray or custom insert |
| Cooking tools | Spatulas, ladles, tongs, whisks, peeler | Next to the stove | Deep drawer with dividers |
| Baking tools | Measuring cups/spoons, rolling pin, pastry brush | Near the counter prep area | Wide dividers or baskets |
| Cutting & prep | Vegetable peelers, zesters, can opener, scissors | Near chopping area | Small compartment inserts |
| Wraps & bags | Foil, cling wrap, zip-lock bags, wax paper | Any accessible drawer | Vertical file organizers work well |
| Junk drawer (redefined) | Batteries, tape, rubber bands, one pen | Away from cooking zone | Small tray system with rules |
| Takeout / extras | Menus, rubber bands, straws, bag clips | Lower priority drawer | One basket, no overflow allowed |
Divider Types: Which One to Actually Buy
| Divider Type | Best For | Pros | Cons | Price Range |
| Bamboo expandable | Cutlery, small tools | Adjustable width, eco-friendly, looks good | Fixed compartment sizes | $15-$35 |
| Acrylic/clear inserts | Anything – very versatile | Customizable, see-through, easy to clean | Can look sterile | $20-$60 |
| Pegboard drawer inserts | Cooking tools, baking | Fully modular, rearrangeable | More expensive | $40-$120 |
| Fabric drawer bins | Deep drawers, bulky items | Soft, flexible, cheap | Not cleanable if stained | $5-$20 |
| Custom drawer inserts | Any drawer if budget allows | Perfect fit, premium look | Expensive, not transferable | $80-$300+ |
The Junk Drawer: Give It Rules, Not a Cleanout
Every home has a junk drawer. The goal isn’t to eliminate it – that never works. The goal is to give it rules so it doesn’t become a black hole.
- One battery per size – extras go in a storage bin in a closet, not the drawer
- One pen, one pencil, one marker – not 14 dried-out pens
- No food. No chargers (they belong at a dedicated charging station). No expired coupons
- One small tray inside to keep tiny items grouped – thumbtacks, rubber bands, a few coins
- Every 3 months, pull everything out and reset it. Takes 10 minutes
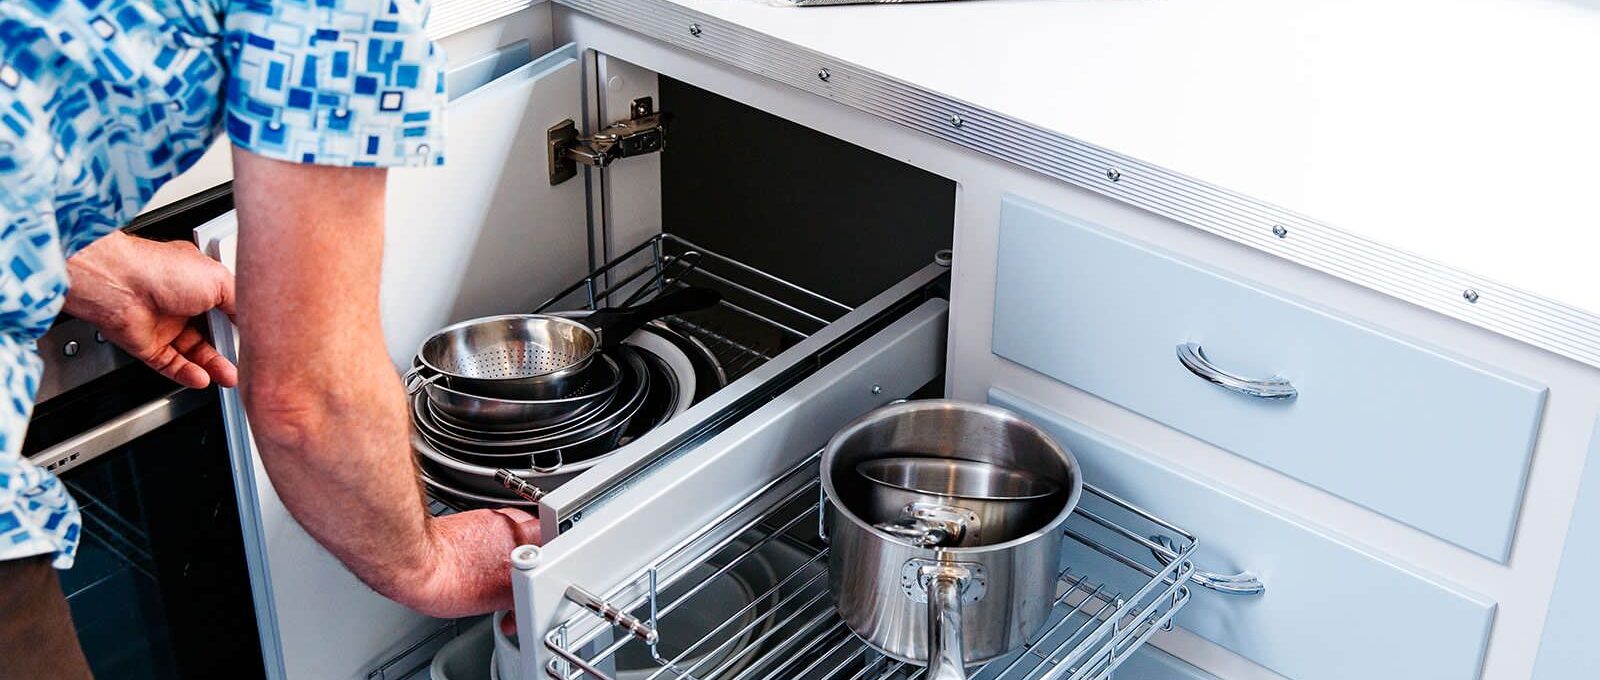
Deep Drawers: Don’t Waste the Vertical Space
Deep pull-out drawers are one of the most underused storage spaces in a kitchen. Most people stack items loosely and lose half the space.
- Use stackable bins inside deep drawers – two levels instead of one
- Store pots and lids vertically using a lid rack – turns a chaotic deep drawer into a navigable one
- Use a pegboard insert for cooking tools in a deep drawer – items stand upright and are visible and accessible
The 5-Minute Monthly Reset
The reason organization systems fail is that they’re treated as a one-time event. Build in a monthly reset:
- Once a month, open each drawer and spend 60 seconds sorting anything that drifted into the wrong place
- Check for items that don’t belong in the kitchen at all and remove them
- Wipe down the organizer tray – crumbs accumulate fast
That’s it. Five minutes total across all drawers. Systems that get maintained stay organized. Systems that don’t, don’t.
Final Thought
You don’t need a kitchen renovation or a custom cabinetmaker. You need a trash bag, a measuring tape, 90 minutes, and the discipline to throw out the eight spatulas you’re never going to use. The result is a kitchen that feels completely different to cook in – even if nothing else changed.


Leave a Comment